Administrator - Forms and tasks
 Updated
by
Jennifer B.
Updated
by
Jennifer B.
Custom forms can be used in any number of ways to improve processes or a customer’s experience; for example, forms can be used to create surveys that are sent out to assess an inspection after it is completed.
Create custom forms and tasks
IMPORTANT: Only users with the Instance Administrator right can create custom forms and tasks.
Create a custom form
- From within OneXperience, click the user icon.
- Select Administration.
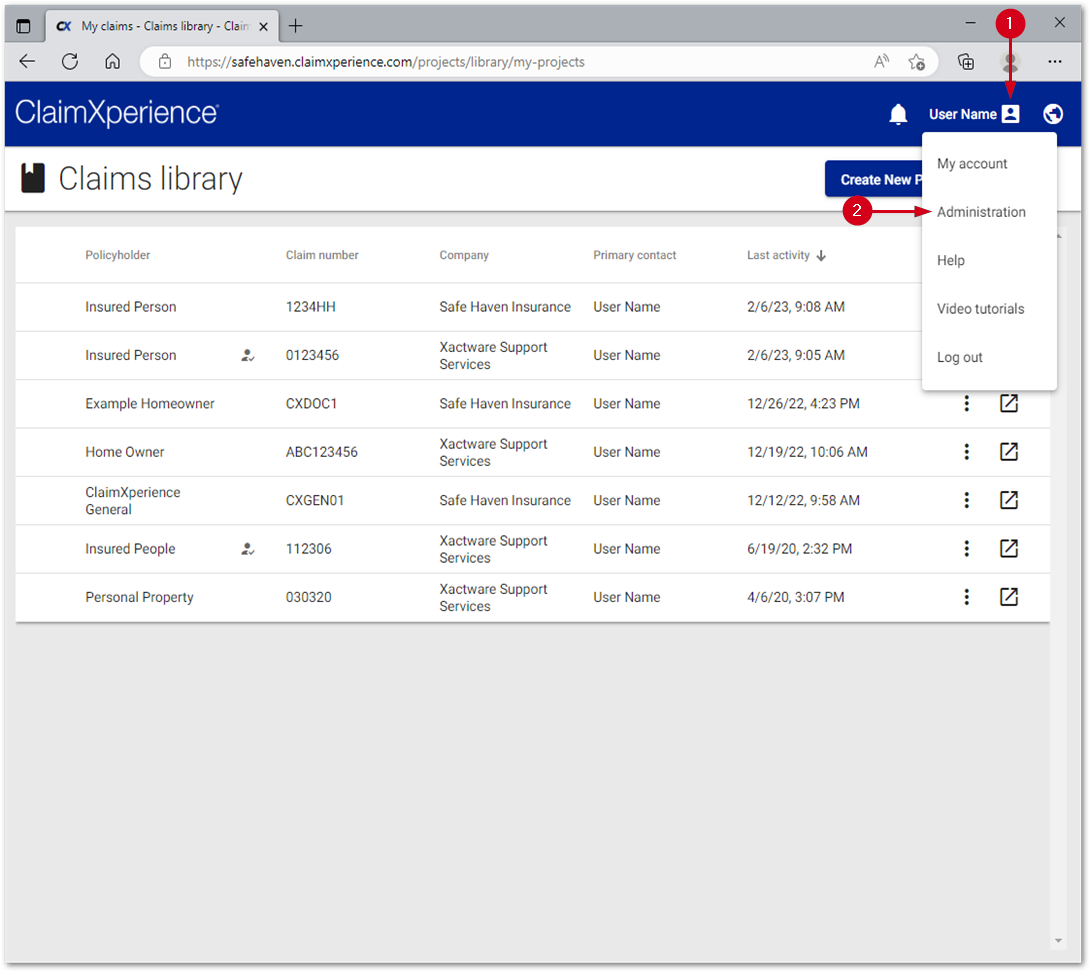
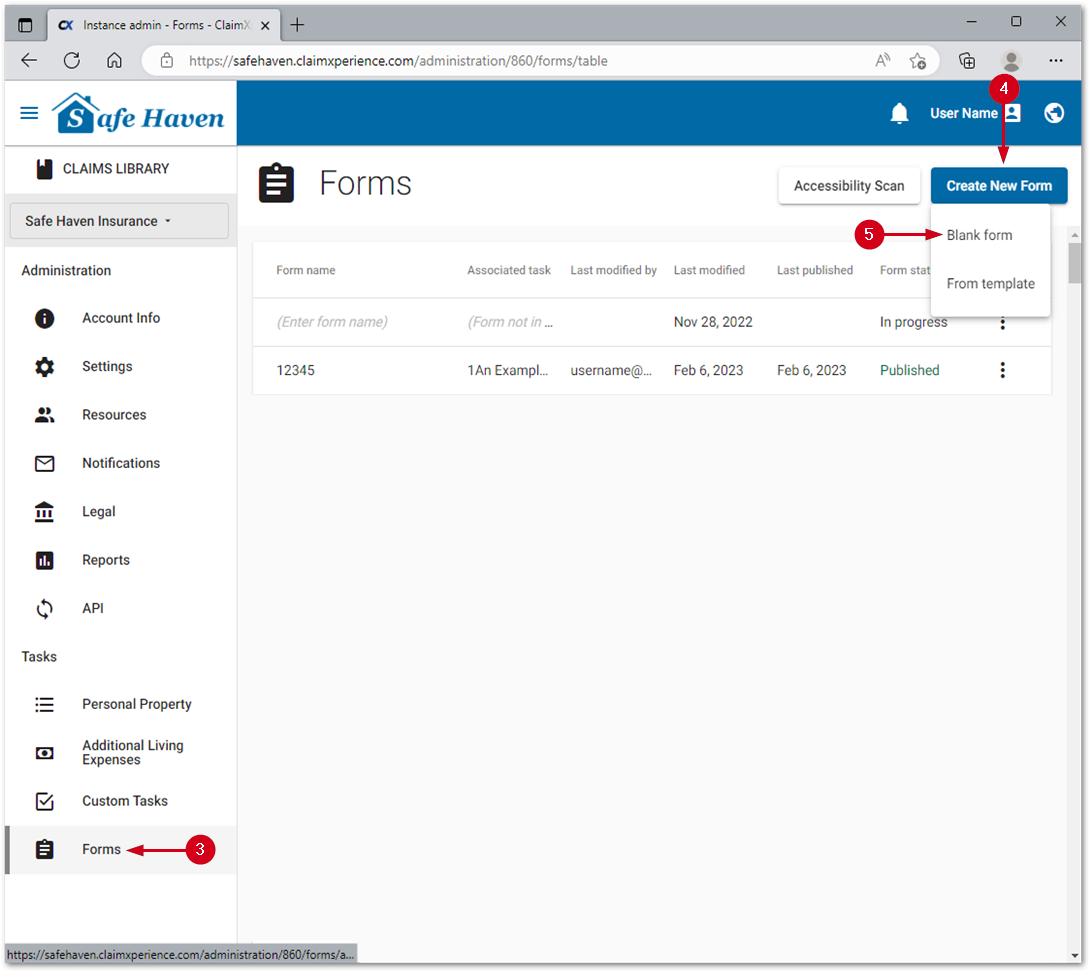
- Select Forms.
- Select Create New Form.
- Select Blank form.
Note: You can click Form template and select a template that will automatically fill in most of the form’s information. You will then be able to edit the information to your specific requirements. Open a form menu for options to Edit, Preview, Duplicate, or Delete that specific form.
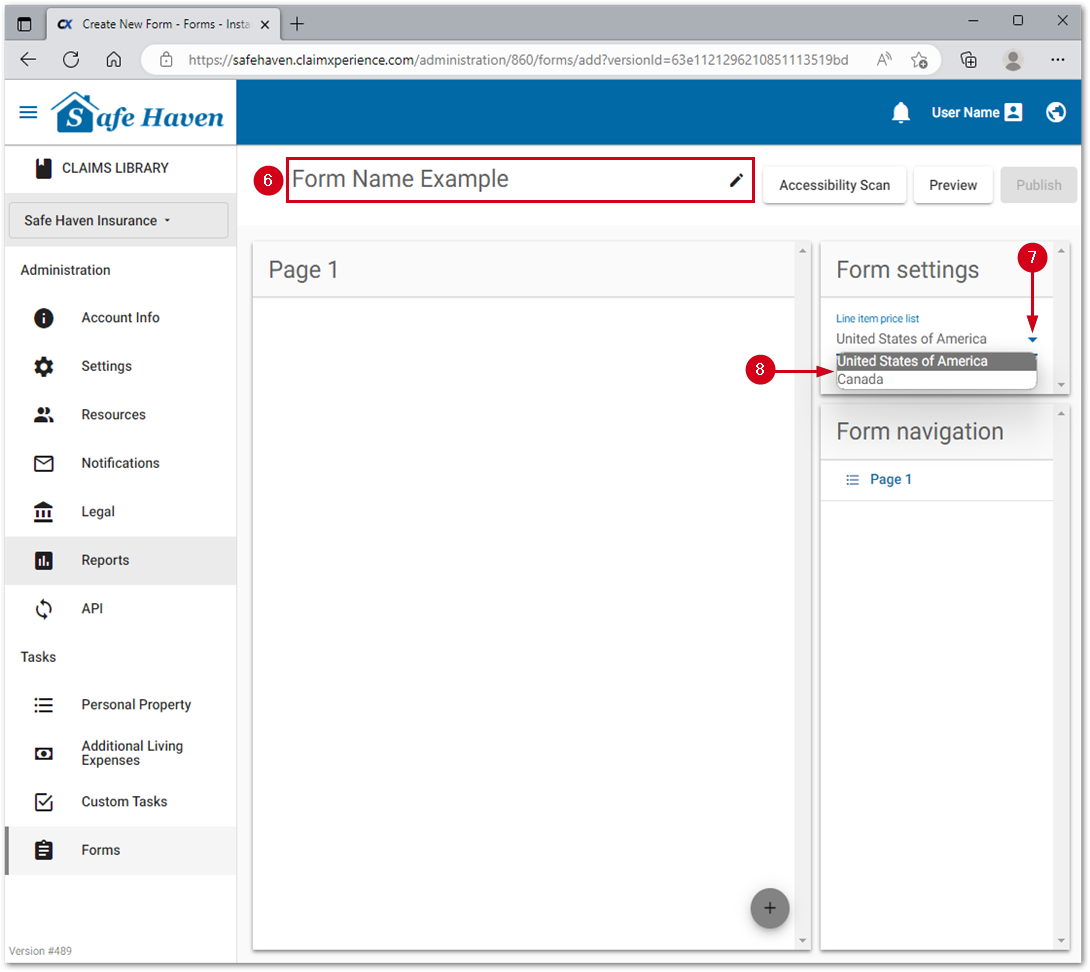
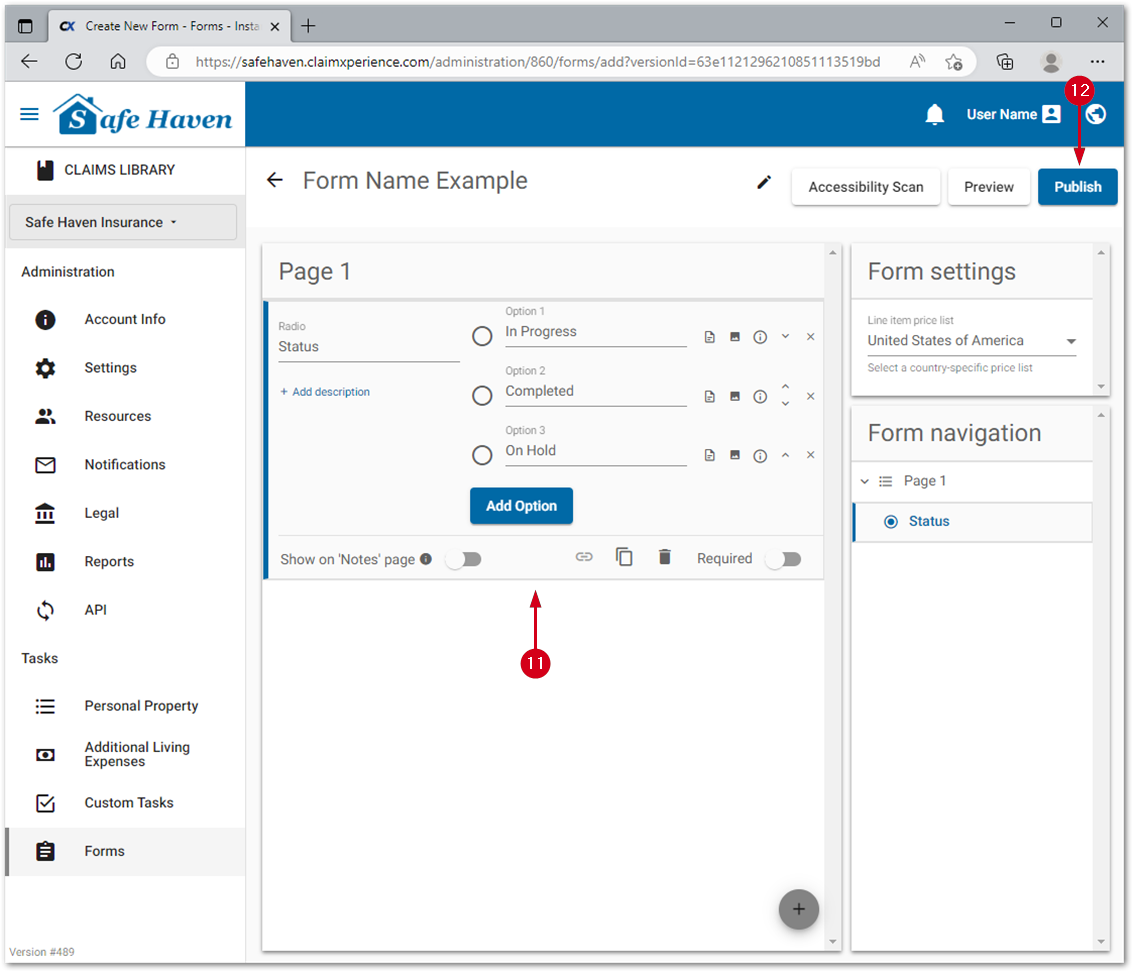
- Enter the form name.
- Open the Line item price list menu.
- Select the desired country.
Note: If a price list is changed after the form has been published, all price list items will need to be added again.
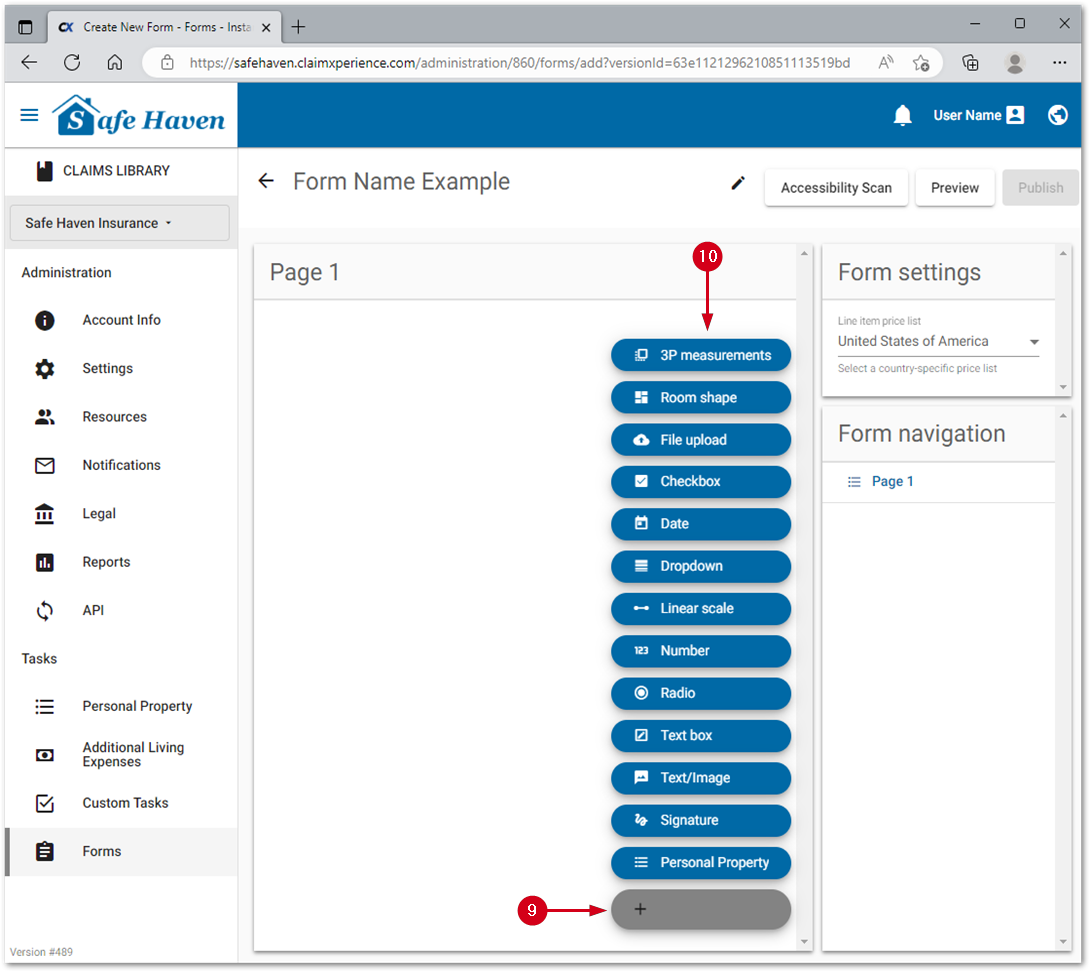
- Select the add button.
- Select the desired action. This will add a section to a page.
Note: Selecting Add New Page adds a new page. Use the Form Navigation on the right to navigate between pages. Repeat steps 8-9 on the new page to add actions for that specific page.
- Click within the action section to edit it.
Note: Repeat Steps 8-11 until the desired options and flow are achieved. The sections can be reordered by dragging and dropping them within the form or by clicking the action arrows in the Form Navigation on the right.
- Select Publish.
Note: Publishing cannot be undone. The form can still be edited, but the only way to un-publish a form is to delete it.
Create a custom task
Tasks are how forms are delivered and how notifications are added and handled in relation to forms.
- From within OneXperience, click the user icon.
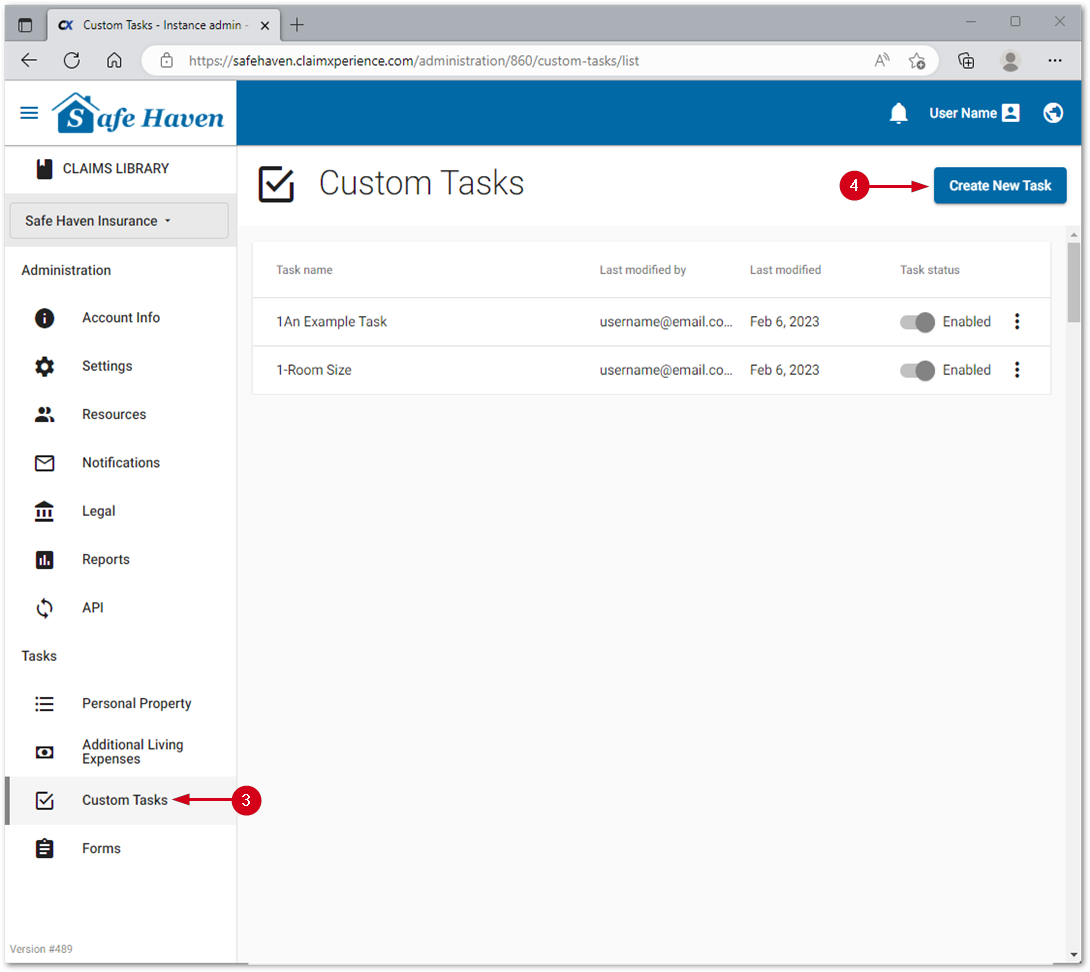
- Click Administration.
- Select Custom Tasks.
- Select Create New Task.
Note: To edit an existing task, click the desired task’s menu and select Edit.
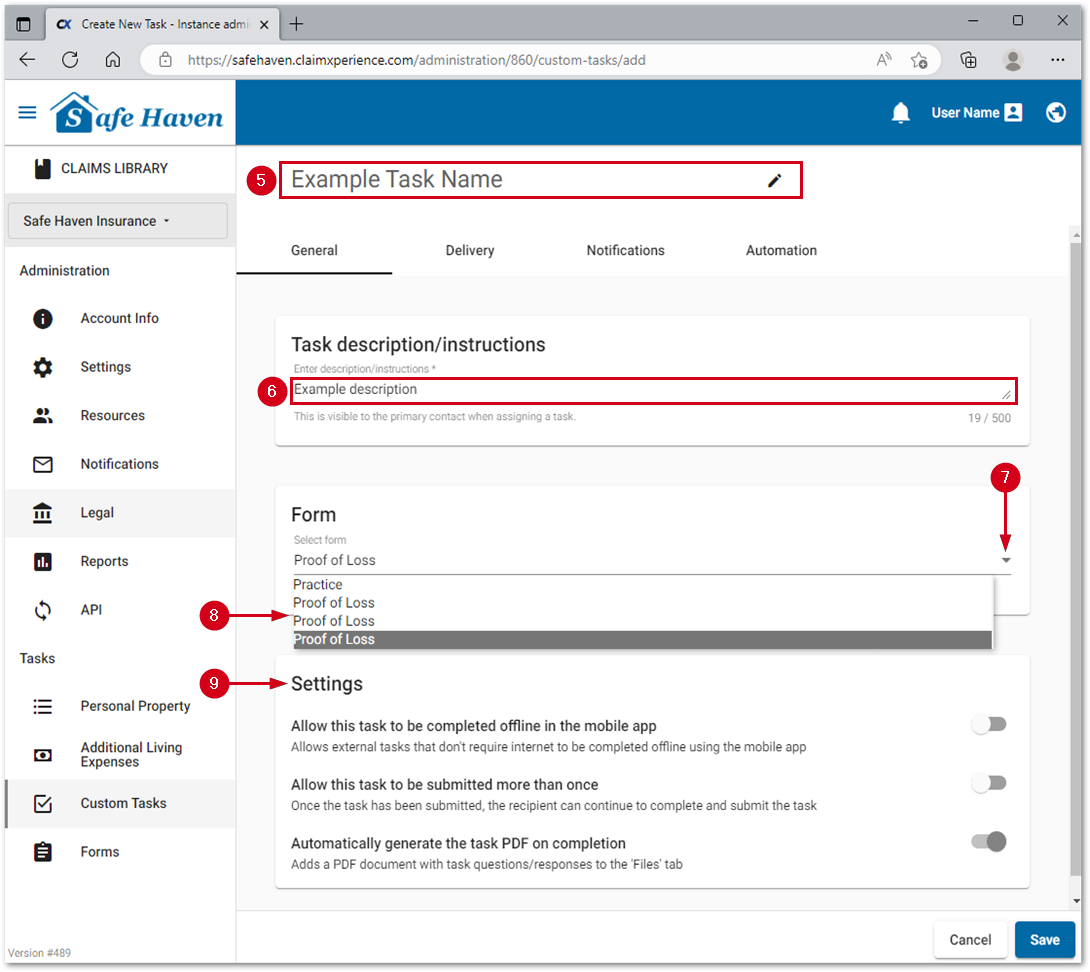
- Complete the Enter task name section.
- Enter the Task description/instructions.
- Open the Select form menu.
- Select which form it will link to by default.
- Select desired options in Settings.
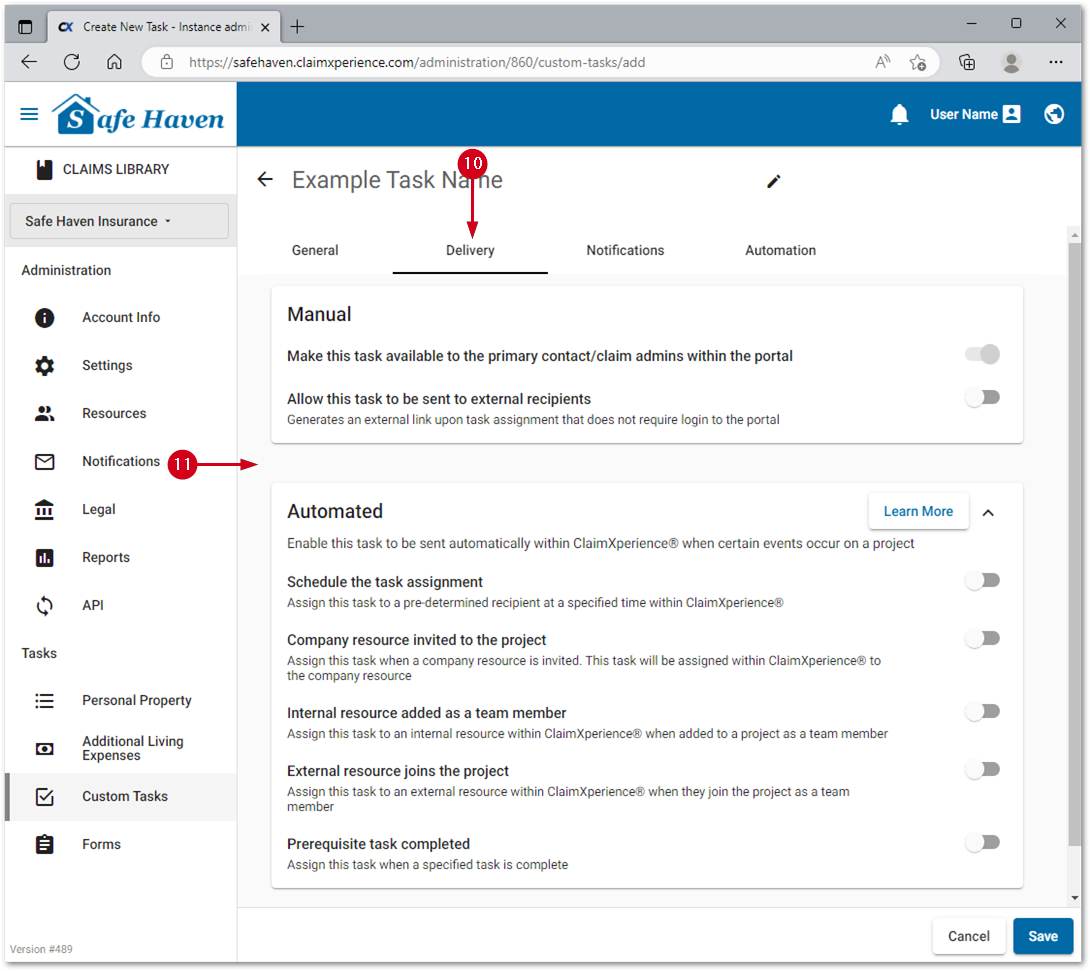
- Select Delivery.
- Select desired Manual or Automated delivery options.
- Select Notifications.
- Add any desired notifications for when the task is assigned or completed.
Note: For task assigned notifications, system reminders which just resend the original assignment email with the word reminder added to the start can be used, or a custom reminder schedule and email template can be used.

- Select Save.